The production of a vacuum-insulated bottle involves eight core processes. Every step, from incoming coil inspection to final product assembly, must strictly follow the applicable process standards. These closely interconnected processes work together to ensure product quality.
Eight core processes:
Raw Material Inspection → Tube Forming → Bottle-Body Hydroforming → Finishing → Cleaning and Welding → Vacuum Evacuation → Surface Treatment → Final Assembly and Packaging
1. Key Process: Incoming Inspection of Stainless Steel Coils
Raw materials are the foundation of insulated-bottle quality. Incoming inspection of stainless steel coils is the first critical quality-control checkpoint in vacuum-insulated bottle production. Only coils that pass strict inspections for material grade, wall thickness, and appearance can proceed to subsequent operations such as stamping and drawing, thereby preventing batch-wide quality problems at the source.
“Non-compliant material may release heavy metals and pose health risks;
uneven wall thickness may cause cracking during subsequent forming;
and surface defects may not be completely removed by subsequent polishing.”
2. Manufacturing the Outer Shell and Inner Liner
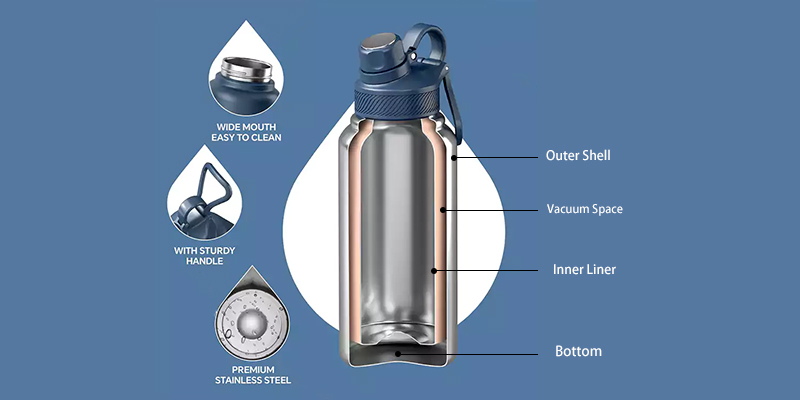
1. Manufacturing the Outer Shell
1.1 Tube Cutting
Cut the raw stainless steel tube to the appropriate length, round the tube, and flatten the welded seam.
This is a critical rim-forming operation performed before the vacuum-insulated bottle is formed. It helps ensure safe subsequent processing and the quality of the finished product.
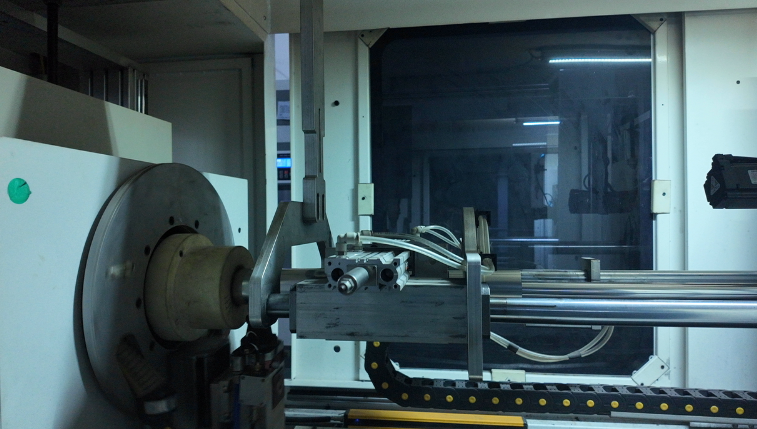
1.2 Hydroforming
There are two principal methods for forming stainless steel into a bottle shape: hydroforming and deep drawing.
Hydroforming: Hydroforming, also referred to here as water forming, is a metal-forming technique. A high-pressure liquid medium, such as water or hydraulic fluid, forces the original stainless steel tube outward against the die so that it takes the specified shape. The resulting shell is open at the bottom, so a stainless steel bottom plate is welded to it to complete the outer shell.
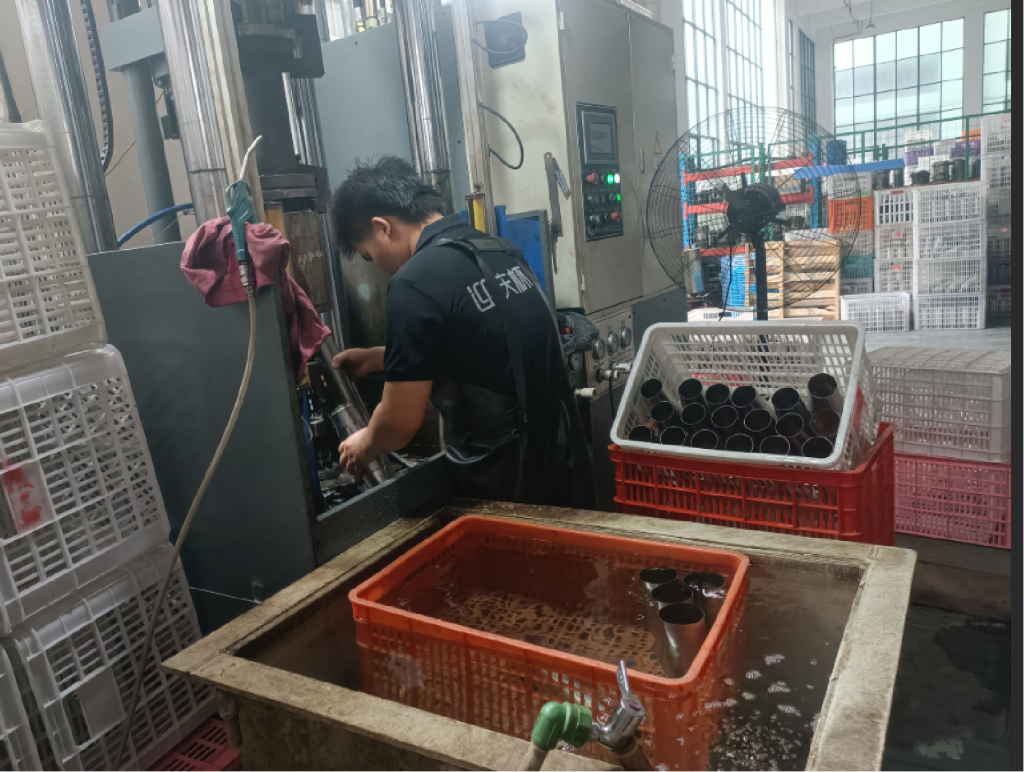
Hydroforming directly determines the final shape, dimensional accuracy, and appearance of the bottle body. Any dimensional deviation or visual defect, such as a dent or wrinkle, will remain as a defect in the finished product. The quality of this operation directly affects the product’s appearance and the feasibility of subsequent assembly.
Drawing: Drawing, also known as deep drawing, is a cold-forming process. A flat stainless steel sheet blank is pressed into a forming die to produce a seamless, one-piece hollow cup.
The outer wall may be made by either method. Hydroforming is more commonly used.
1.3 Cup Separation
A pneumatic cutter or laser separation machine is used for automated cutting and separation. If the outer shell is produced by hydroforming, this separation operation is required.
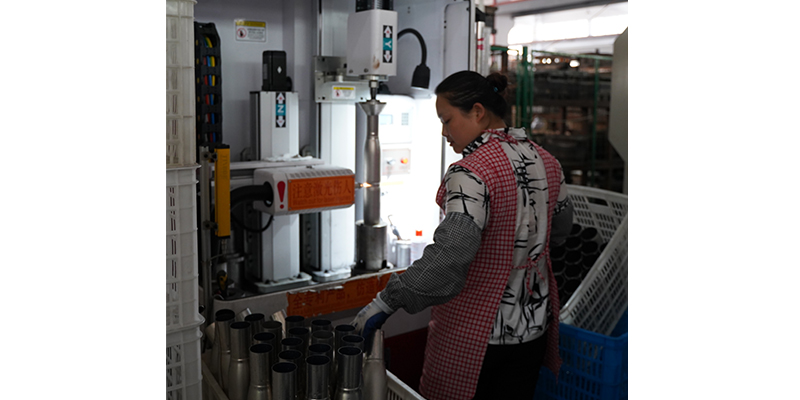
1.4 Necking
A dual-station CNC necking machine is used to form the bottle mouth. The neck transition must be smooth and even, with no cracks, surface bulges, steps, collapsed edges, or similar defects. Critical dimensions, including mouth diameter and height, must strictly comply with the tolerances specified in the drawings.
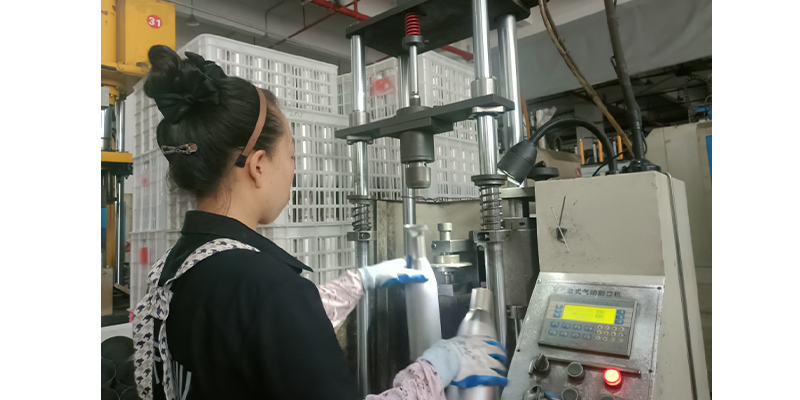
1.5 Mouth and Bottom Finishing / Reshaping / Drawing
A hydraulic reshaping machine is used to remove sharp edges and machining burrs from the bottle mouth completely, ensuring safe, smooth edges and bringing the product dimensions into compliance with the process drawings.
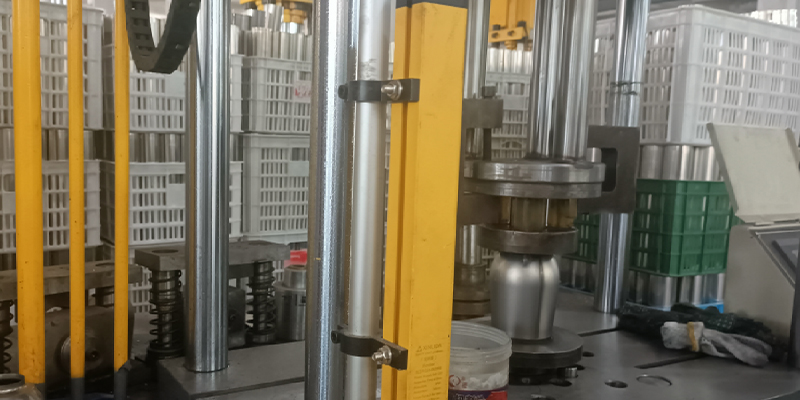
1.6 Thread Rolling
Thread rolling is a core bottle-mouth forming operation that directly determines how smoothly the lid engages and how reliably it seals. A professional servo-controlled thread-rolling machine is used. Its precision servo system controls the movement of the rolling wheels to produce consistently accurate threads, providing a solid foundation for sealing reliability and a smooth user experience.
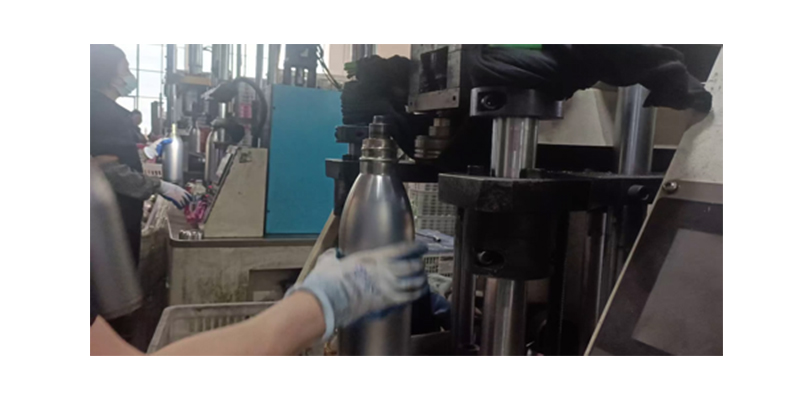
1.7 Mouth and Bottom Trimming
Excess stainless steel is trimmed from the mouth and bottom. The cut surfaces at the bottle mouth and bottom are finished smooth and free of obvious burrs, after which the mouth edge is rolled outward.
1.8 Cleaning and Drying
A fully automatic ultrasonic cleaning and hot-air drying line is used to remove lubricants and dust, leaving the bottle body clean, oil-free, and free of water marks.
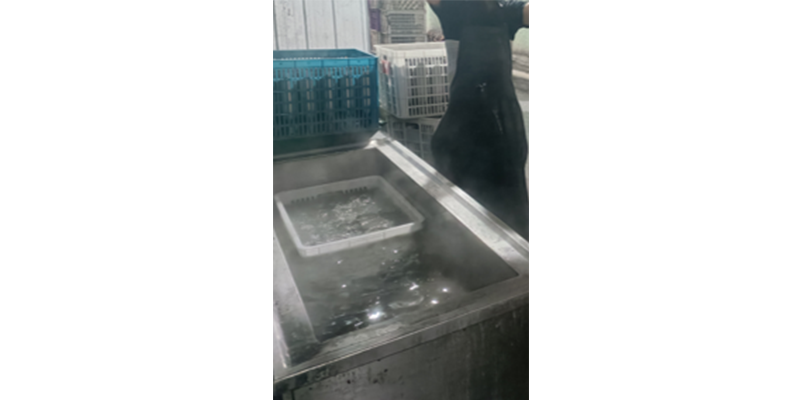
Key process parameters and standards:
- Cleaning-solution ratio: Mix the cleaning agent with clean water at a ratio of 1:50. This provides strong cleaning performance while preventing chemical residues from corroding or damaging the bottle body.
- Cleaning procedure: Perform two pure-water rinses and three high-frequency ultrasonic cleaning cycles. Maintain the water temperature at 60–70°C to remove surface oil and metalworking debris thoroughly.
- Drying requirements: Maintain the hot-air oven at ≥100°C and dry at a constant temperature for 10 minutes. This completely removes water from the inside and outside of the bottle body and prevents rust during subsequent welding.
2. Manufacturing the Inner Liner
2.1 Tube Cutting
Cut the raw stainless steel tube to the appropriate length.
2.2 Hydroforming or Deep Drawing
The inner liner may be manufactured by either method. Hydroforming is more commonly used.
2.3 Cup Separation
2.4 Reshaping
2.5 Mouth and Bottom Trimming
2.6 Thread Rolling / Thread Forming
(Normally, if the outer shell is designed with threads, the inner liner has no threads.)
2.7 Cleaning
2.8 Inspection
3. Welding the Inner-Liner Bottom
Weld the inner liner and bottom plate together.
An automatic laser circumferential welding machine uses a high-energy laser beam to fuse the inner-liner bottom precisely to the cylindrical body. This operation directly determines the bottle’s leak resistance; even a slight welding deviation may cause the finished product to leak.
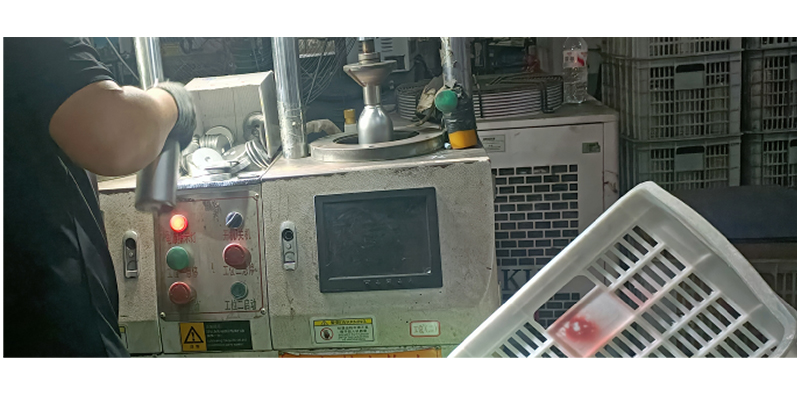
Key technical control standards:
● Weld integrity: The weld must be continuous and uninterrupted, with no porosity, weld interruptions, or missed welds. This ensures the overall leak-tightness of the inner liner and is fundamental to preventing leakage.
● Smooth weld appearance: The weld surface must be smooth and even, with no raised weld beads, weld scars, depressions, or slag inclusions. This prevents structurally weak points that could crack or deform during subsequent operations.
● Critical quality-control point: This operation is a key quality-control checkpoint. Weld defects can directly cause leakage and product rejection. Strict in-line inspection or manual sampling is therefore required, and non-conforming products must not proceed to the next operation.
4. Leak Testing
Test the bottle body using a negative-pressure leak tester.
Core functions and implementation standards:
- 100% inspection: Inspect every inner liner after bottom welding rather than relying on batch sampling.
- Defect screening: Accurately identify concealed leakage points such as weld pinholes, microcracks, and areas of incomplete fusion.
- Loss prevention: Immediately segregate leaking parts for rework so that they do not enter subsequent operations and cause the entire bottle to be scrapped.
5. Assembly (Mouth Fitting)
Use a press to assemble the inner liner and outer shell.
6. Bottle-Mouth Welding, Sealing, and Forming
Use a laser mouth-fitting and straight-mouth welding machine to fuse the joint between the inner liner and outer shell.
This operation directly determines the airtightness of the bottle body. It is essential to the bottle’s thermal-insulation performance and provides a sound sealed structure for the subsequent vacuum-evacuation process.
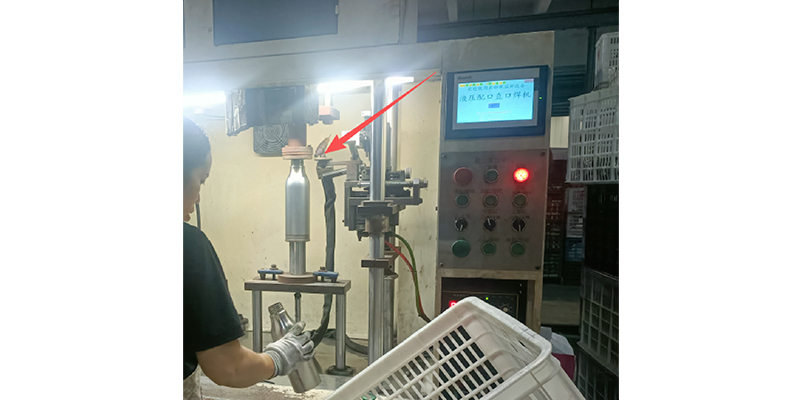
Key process quality-control standards:
● Strict control of coaxial alignment: The inner liner and outer shell must be precisely aligned coaxially, with deviation strictly controlled within 0.1 mm. This prevents misalignment from causing uneven welding stress and reduces the risk of weld cracking or seal failure.
● Sound, dense weld: The weld must be continuous, full, and dense, with no porosity, pinholes, weld interruptions, or other defects. Its surface must be smooth and free of raised weld beads, weld scars, and depressions. This ensures airtightness and provides a suitable foundation for subsequent grinding.
● Seal-performance testing: After welding, conduct a preliminary airtightness inspection. Use pressure testing to identify potential microleaks, verify the sealing integrity of the double-wall structure, and provide reliable structural assurance for creation of the vacuum layer.
7. Bottle-Bottom Sealing and Welding
Weld the outer shell to the bottom assembly. This comprises welding the getter plate and laser circumferential welding of the intermediate bottom plate.
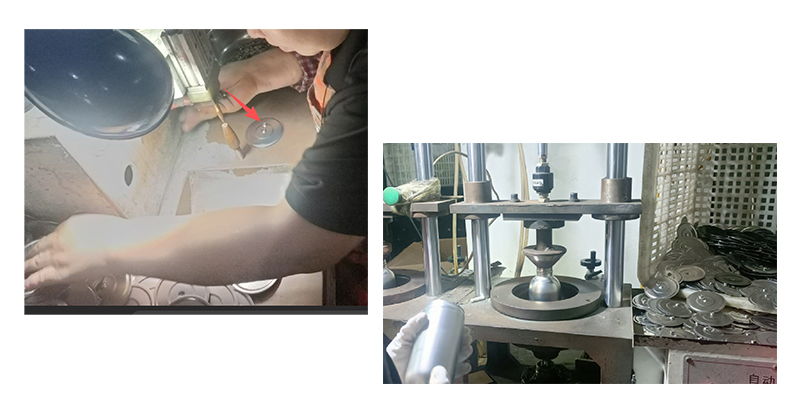
01 Welding the getter plate
Use fiber-laser spot welding to secure the metal getter plate. The getter absorbs trace residual gases and gaseous contaminants within the interwall space, helping stabilize the vacuum and significantly extend the bottle’s thermal-insulation life and long-term vacuum retention.
02 Welding the intermediate bottom plate
Use laser circumferential welding to seal the evacuation opening at the bottom. The weld must be uniform, continuous, complete, and free of defects. This completes the final seal of the double-wall bottle body and creates the primary barrier to convective heat transfer.
Important note: This operation is the final step in creating the vacuum seal. The getter plate absorbs residual gases from the interwall space to maintain the vacuum over time, while welding the intermediate bottom plate provides the final physical seal. Any welding defect may allow air to leak in and cause the bottle to lose its thermal-insulation function.
8. Mouth Grinding
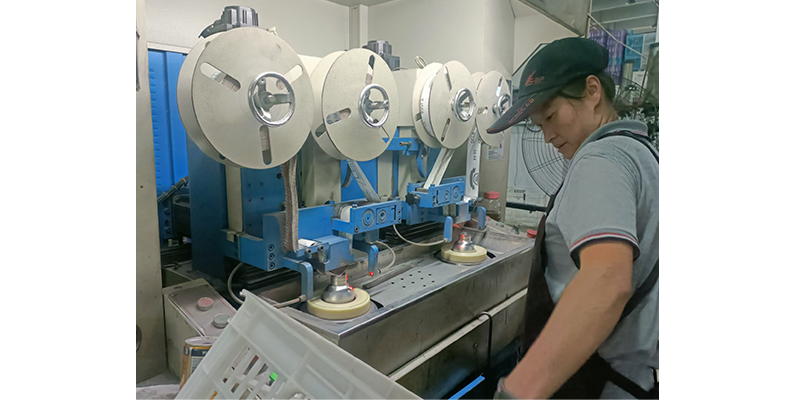
Use an automatic sanding and grinding machine to remove weld scars and raised areas from the welded joint completely. The transition at the joint must be smooth and step-free to ensure smooth lid assembly and compliant sealing performance.
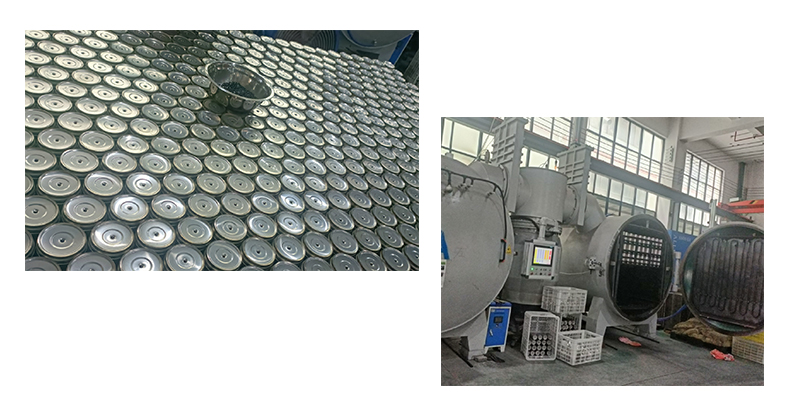
9. Vacuum Evacuation
Evacuate the interwall space using vacuum equipment.
Core functions of the process:
- Creating a thermal barrier: Remove the air from the interwall space to form a vacuum layer that suppresses convective heat transfer. This is the physical basis of thermal insulation.
- Determining insulation quality: The vacuum level directly affects insulation duration and durability and is a key criterion for determining whether a product is defective.
Important note: Vacuum evacuation enables the core physical principle of thermal insulation. The vacuum layer suppresses convective heat transfer. The vacuum level directly determines both insulation performance and service life and is one of the most important indicators of vacuum-insulated bottle quality.
10. Thermal-Insulation Performance Testing of Finished Bottles
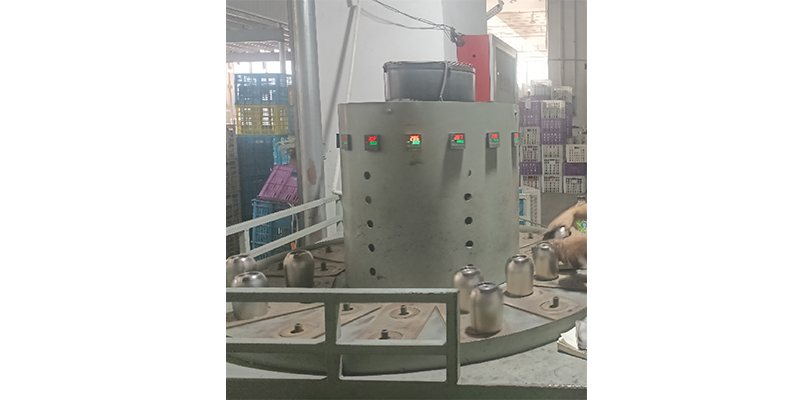
Use a fully automatic insulation-performance retesting and temperature-measurement machine to inspect 100% of finished bottles and ensure that every bottle meets the applicable insulation standards.
Key testing objectives and implementation standards:
● 100% inspection coverage: Measure the temperature performance of every finished bottle on the production line, with no sampling and no omissions, so that each bottle undergoes strict inspection.
● Vacuum-performance verification: Fill the bottle with hot water to simulate actual use and monitor the temperature-change curve throughout the test. This accurately determines the thermal performance and heat-retention duration of the vacuum layer against the applicable national and company standards.
● Zero tolerance for non-conforming products: Products that fail to meet heat-retention-duration or sealing requirements are removed directly from the production line. This prevents defective products from proceeding further and ensures consistent outgoing quality.
11. Electropolishing
Use a fully automatic electropolishing machine to level and smooth the inner surface of the inner liner electrochemically. The process thoroughly removes welding oxide scale, fine scratches, and surface pitting and forms a dense, corrosion-resistant passive film on the metal surface, providing food-contact-grade protection for the inner wall.
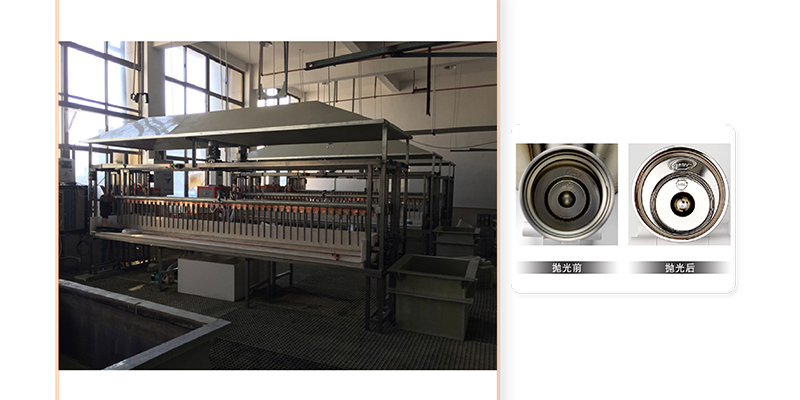
Important note: Electropolishing is performed not only for appearance but, more importantly, for food safety. It removes undesirable substances from the inner wall and forms a corrosion-resistant passive film. Improper process control may affect insulation performance and could also increase the risk of heavy-metal release, posing a serious health hazard.
01. Insufficient polishing
Residual welding oxide scale on the inner wall may contribute to slow air leakage in the interwall space, rapidly reducing insulation performance and causing the bottle to lose its core function.
02. Cleaning residue
If the electrolyte is not thoroughly removed, heavy metals may leach out during prolonged use with hot water. This would seriously violate food-contact requirements and endanger users’ health.
03. Excessive corrosion
Improper operation may corrode and thin the inner-liner wall. During normal use involving repeated heating and cooling, this may readily lead to perforation and leakage, requiring the product to be scrapped.
12. Mechanical Polishing
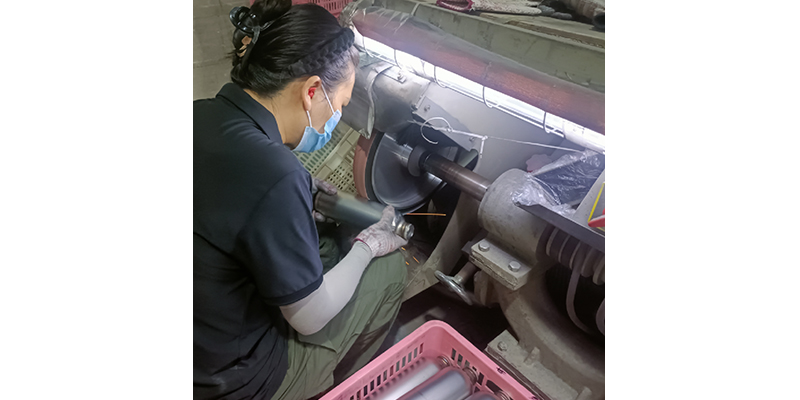
Polish the bottle’s exterior to obtain a smooth finish and a smooth, bright bottle mouth. There must be no obvious polishing streaks, scratches, black lines, or pits.
Process objectives and standards:
01. Rough polishing
Completely remove weld scars, deep scratches, and heat-induced black oxide from the bottle body to achieve initial surface leveling.
02. Intermediate polishing
Remove marks left by rough polishing and create a consistent surface texture with natural, uniform transitions.
03. Fine polishing
Polish mirror-finish products to a high-gloss surface. For matte-finish products, ensure a fine, soft, and uniform surface with no localized glossy spots.
13. Cleaning
Clean the bottle and wipe it dry, preparing it for exterior coating or decoration.
14. Exterior Finishing of Vacuum-Insulated Bottles
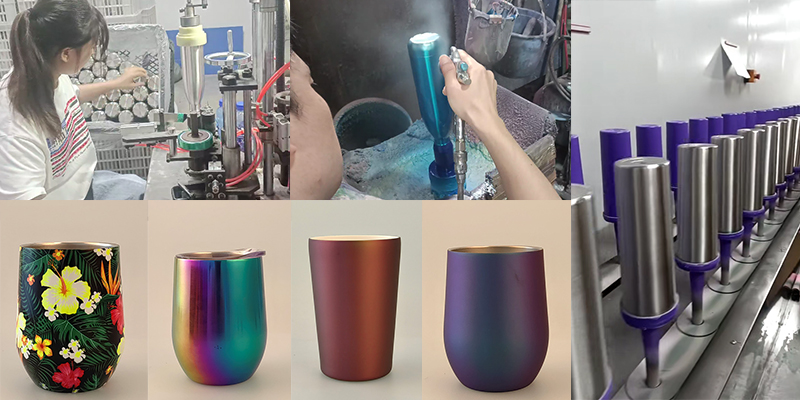
YEWAY offers spray-painting and powder-coating processes. Common options include natural metal finishes (brushed, sandblasted, or mirror-polished), colored soft-touch coatings, high-hardness powder coatings, and PVD vacuum ion plating.
Spray-painting process: High-pressure atomization is used to apply specialized metal paint evenly to the bottle body. The process provides high color saturation and supports various finishes, including high-gloss and matte effects, giving the product a refined visual and tactile quality and a broad choice of colors.
Powder-coating process: Electrostatic attraction deposits powder coating on the bottle body, after which high-temperature curing forms a dense coating. The coating provides strong adhesion and a substantial feel, together with superior resistance to wear, impact, and corrosion.
If you want to learn more about our custom water bottle surface finishes and decoration options, please see our custom water bottle surface finishing page.
15. Graphic and Logo Printing
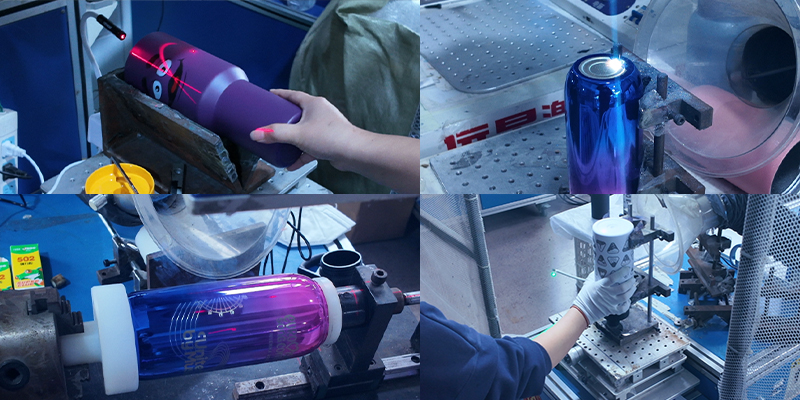
Various techniques are used to apply graphic designs and logos to the bottle. Common methods include pad printing (sealed-ink-cup pad printing), screen printing, heat-transfer printing, and 3D printing (raised-relief effects).
For more information about our custom logo and graphic printing options for water bottles, please see our custom logo for water bottles page.
16. Assembly
Assembly is the critical link between individual components and the finished product. It requires precise assembly and strict sealing tests to safeguard the product’s insulation performance and user experience. It is the decisive step in turning parts into a conforming finished product.
- Precision component assembly: Strictly follow the assembly standards to install and secure the lid components, food-grade silicone sealing ring, food-contact drinking straw, and transition component in sequence. Ensure that every component is accurately positioned, with no looseness or misalignment, to provide a sound structural foundation for the product’s basic functions.
- Sealing and opening/closing performance testing: Perform two quality checks on each assembled product. Test the lid for smooth opening and closing and comfortable operation. Also test the bottle upside down, on its side, and at other angles to confirm a tight seal, prevent leakage, and ensure reliable use.
17. Packaging
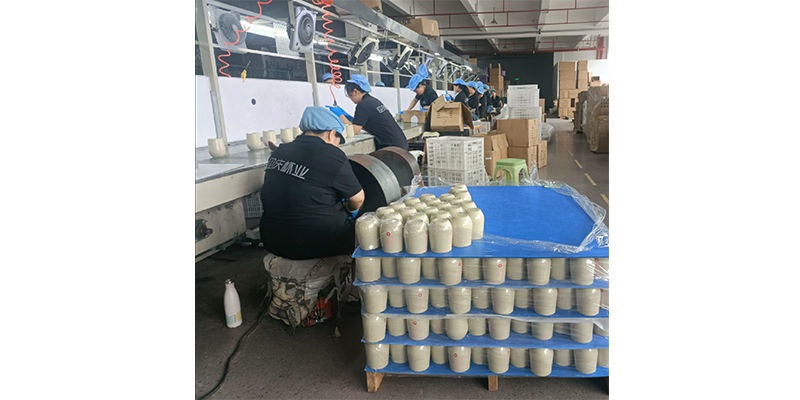
Packaging is the final safeguard for quality delivery. Standardized packaging operations ensure that every product reaches the customer in perfect condition after transportation.
Private Label Water Bottle Manufacturing
For brands looking to launch their own drinkware line, manufacturing is only part of the process. Private-label water bottle production can also include custom bottle designs, colors, surface finishes, logos, packaging, and other brand-specific requirements. By working with an experienced manufacturer, brands can develop a product that matches their market positioning while keeping production and quality control under one roof.
If you are looking for private-label water bottle manufacturing, YEWAY can support the process from product development and customization to mass production and packaging.
How to Choose a Reliable Water Bottle Supplier
Understanding the manufacturing process is also useful when evaluating a water bottle supplier. Knowing what to look for in materials, forming, welding, vacuum performance, surface treatment, quality control, and final testing can help you distinguish a real manufacturer from a trading company or supplier with limited production capabilities.
If you are evaluating potential suppliers for your next drinkware project, see our guide on how to choose a reliable water bottle supplier.
Conclusion
Understanding the manufacturing process of stainless steel water bottles is essential for B2B customers seeking reliable products. From material selection to final packaging, every step is designed to ensure quality and performance. By choosing a reputable manufacturer, brands and individual sellers can provide their customers with high-quality water bottles that meet their hydration needs.
YEWAY is a professional manufacturer of vacuum-insulated water bottles. We specialize in developing and manufacturing high-quality custom vacuum-insulated water bottles, wholesale vacuum flasks, bulk tumblers, coffee mugs, insulated cups, can coolers, children’s water bottles, pet water bottles, and other insulated containers designed to keep beverages hot or cold for extended periods. YEWAY provides one-stop custom stainless steel container and private-label drinkware manufacturing services, covering product conception, design, prototyping, forming, and mass production. If you have any questions, please feel free to contact us.